
Why a splice matrix
Every splice tech has done this on the tailgate: a big feeder comes in, a few smaller cables go out, and you're squinting at a work print trying to keep the counts straight. The experienced hands just know how it flows. The new folks don't, and Excel can't draw it for them.
The chart builder answers "which count is on which fiber." The splice matrix answers "where does that count go next."
The Splice Matrix Builder is one splice point, done well. It's not a network documentation system and it isn't trying to be. It's the closure in front of you: the cables entering, the cables leaving, and how the fibers connect across. You can collapse a 1728 down to its tubes to see the whole splice at a glance, then expand the one group you're working to the individual fiber.
Reading a cable stack
A count is a named circuit set, like ABCD001, 1-288. The name and number are the fiber's identity for its whole life across the network, so at a splice you match the same name and number on both sides. That's how a count "flows" cable to cable.
A cable carries one or more counts, and they partition its fibers. A 144ct might be SC5678, 1-48 then ABCD001, 49-96 then dead, 97-144. Those sizes add up to 144. Read a stack correctly and the numbers always balance, which is the quickest way to catch a mistake before you fire the fusion splicer.
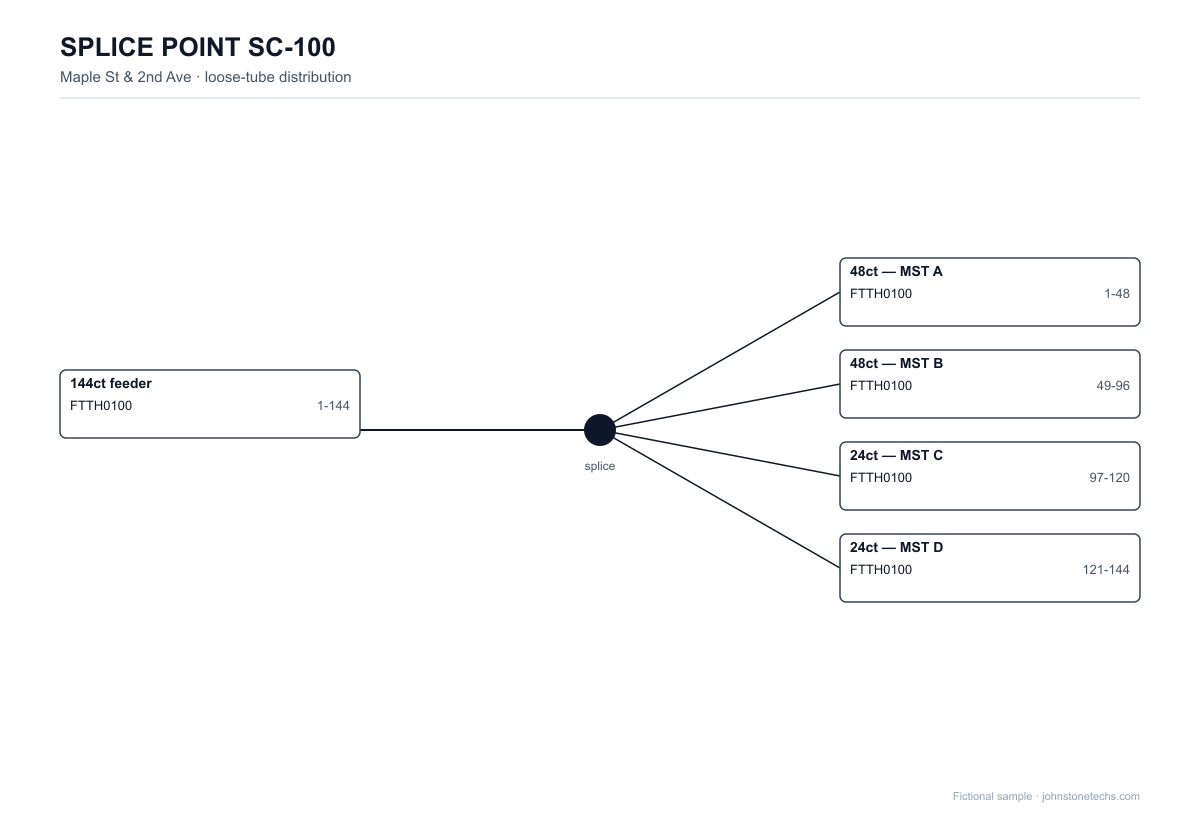
Add the cables
Open the builder. Use + Cable in for each feeder and + Cable out for each cable leaving the splice. Click a cable to set its label, fiber count, and whether it's loose-tube or ribbon (with fibers-per-ribbon and ribbons-per-group, exactly like the chart builder, so ribbon stacks color correctly).
Enter the counts
In the same cable editor, type the stack, one line per count: NAME,start-end. For example:
ABCD001,1-288SC5678,1-48XD,49-72
The count label shows on every fiber, the tube bands show which counts they carry, and a collapsed cable shows the whole stack like a count sheet.
Connect by count
This is the part that saves the most time. Hit Connect by count and the builder matches counts by name and number across the splice and wires the fibers for you. A count that splits across several output cables is handled automatically, and anything that doesn't have a match on both sides is reported so you can see what didn't splice through.
Prefer to do it by hand? Click a fiber, tube, or cable on one side, then its match on the other. Tube-to-tube maps 1:1; peel a few fibers off to a different group by clicking fiber to fiber.
Dead and XD counts
Spare or dead fibers get their own label, XD or dead, and their number is the physical fiber (XD 13 is fiber 13). Anything you don't assign a count is filled with XD automatically, so every fiber is accounted for, and dead fibers are left out of the through-splice.
Scan a work print
Have a photo or PDF of the print? Click Scan a work print, drop the loop over the splice point you want, and the builder reads each cable's stack and lays out the matrix. If your print has several splice points on one page, the loop is how you tell it which one to import. There's a Try a sample button to see it work before you scan your own.
Print and export
What you see is what prints. Use Print / PDF for the as-built, PNG for a clean image to drop in a report (no more snipping-tool screenshots), or SVG for a scalable copy. Save writes a file you can reload later to keep editing.
The builder is free while in beta. You sign in once with your email. It's built to grow into a paid product later, but the counts, the connections, and the diagram are yours to use today.